Retired Techie
Getting older, not necessarily wiser!
JWM Agnostic X on Arch – Part 2
Published on November 5, 2022 at 10:26 pm by LEWIntroduction
If you followed Part 1, you should have a working Arch based JWM installation. In this post, before jumping into detailed configuration analysis, we will be discussing some basic operational support issues.
I am going to be adjusting my initial project scope for this series of posts. I used to hate hearing that back when I worked for a living. In this case I have no one to blame but myself. For those following along, it is not a major change, but it is something you need to be aware of, just in case things suddenly start making no sense.
Scope Change
The first bit of change, this is not going to be as agnostic as I would have liked. The file manager I intended to use was xfe (which comes with a text editor also, xwrite). However I found that it was not in the official Arch repositories. It does exist in the Arch User Repositories (AUR) however. Also, the general icon set I was intending to use, Tango-icon-theme, is also in the AUR and not the official repositories. You can read about using the AUR in this post.
The AUR, while not difficult to use, is out of scope for this series of posts. So I will be relying on what is available in the official Arch repositories. For the icons, I may end up going straight o the source as opposed to using the AUR. We shall see how things go.
One final scope change. I have spun up a virtual machine for this project. It makes taking screen shoots much easier. Plus I am not confused by having two keyboards in front of me. I discuss using a virtual machine in the series of posts on installing Arch. If you are interested, please go to this here.
One final note on the last post. Turns out you do not need xorg-fonts-75dpi or xorg-fonts-100dpi. The only font set you need to install to get things going is xorg-fonts-misc. I have made adjustments to the previous post already.
The Base JWM Install
Remember from our last post that we have not installed a display manager. So we log in though a text console and use startx to get jwm running. Starting jwm from a clean install, you are greeted with a generic black screen.
There is a tray (tool bar) along the bottom of the screen with a few tools in it. If you left click on the desktop, or left click on the jwm icon in the lower left, you will open up a menu. Since we only installed xterm, the Terminal application menu item is the only thing working.
Installs That Make Life Easier
Two applications you will want to install right away are a file manager and a text editor. Since we have a terminal, we can do both functions from the command line, but that sort of defeats the purpose of a Graphical User Interface (GUI).
This is where we fall off the agnostic wagon. I am going to install the GTK3 version of PcmanFM for the file manager. For a text editor I am going to install Geany (also GTK3 based).
sudo pacman -S pcmanfm-gtk3 geany
Note that Geany will also install its own tango and hicolor icons, thus creating a minimal folder structure for both in usr/share/icons. We talked about tango icons already, and hicolor icons is a dumping ground where most applications install their icons. GTK3 will add the Adwaita icon theme. Pcmanfm does not provide its own icons, and instead looks for a system icon called system-file-manager.We will pull this in later.
Running Applicaitons
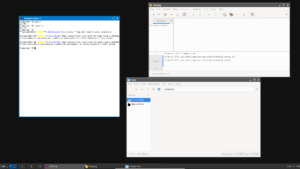
Since we have not yet gotten into menu structure, the best way to run theses two programs is from the command line. So open xterm, and enter the program name followed by a “&”. This will push the program to the background as far as the terminal is concerned, and you can then use the terminal for other things.
pcmanfm &
geany &
A Few More Applications
Now we just need a couple more application installed , and we can start doing some configuration. Using the same process I want to install a web browser, and an archive manager. You are free to install what you are comfortable with. I will be installing firefox, xarchive, and a number of actual archive programs to use with xarchive.
sudo pacman -S firefox
sudo pacman -S xarchiver tar gzip bzip2 zip unzip p7zip unrar
Conclusion
At this point we should have jwm up and running, and have installed several application that will be useful when we start configuring the interface in the next post.
We have not dived into production type appliccations yet, as that will be dependent on what you use your computer for. After finishing the configuration, we will look at some common application, and some alternatives to them.
JWM Agnostic X on Arch – Part 1 – The Install
JWM Agnostic X on Arch – Part 2 – Adding Some Applications
JWM Agnostic X on Arch – Part 3 – Initial Setup for Config File
JWM Agnostic X on Arch – Part 4 – StartupCommand and Group
JWM Agnostic X on Arch – Part 5 – Building a Menu Structure
JWM Agnostic X on Arch – Part 6 – Tray Attributes
JWM Agnostic X on Arch – Part 7 – Tray Content
JWM Agnostic X on Arch – Part 8 – Desktops, Bindings, Colors, and Fonts
JWM Agnostic X on Arch – Part 9 – Styling of Major Elements


Add New Comment