Retired Techie
Getting older, not necessarily wiser!
Skinning Media Wiki
Published on July 4, 2022 at 6:51 pm by LEWIntroduction
In this post we I will be changing the Media Wiki skin from Vector to Timeless, then making some adjustments for my particular site.
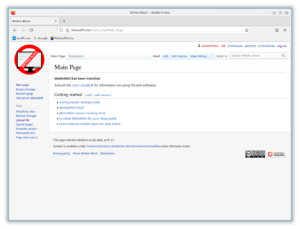
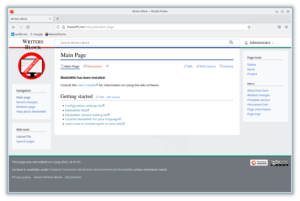
In the last post we customized the logo. In this post I will change the wiki from the default Vector skin (on the left) to one of its pre-shipped skins called Timeless (on the right). Timeless has a somewhat more modern look, as compared to the default Vector skin.
Changing the User Skin
First Thing, there are basically two skins in play here. The skin everyone sees is set in the LocalSettings.php file (see last post). If you have an account, you can set a different skin for that account.
To change skins, you need to be logged in. In the default Vector skin you will find the Preferences in the upper right corner, close to the user name. When you go to preferences, one of the tabs at the top of the new page will be Appearance. Here you can select the skin to use with your account. This skin will only be used with your account. If you log out, the Wiki will go back to the default Vector skin. To change this behavior, we need to change the wiki default skin, not just a user account skin.
I am going to set the skin to Timeless and save. Timeless has a multi column layout, and is somewhat more mobile friendly than Vector. It also uses a drop down menu from the user name.
Alas everything is not perfect, as you will note my site title in the upper left is a little long and spills into two lines. Something I will want to fix.
Changing the Default Skin
To change the default skin, we need to edit the LocalSettigns.php file. If you have been following these posts, you should have a copy on your computer. Otherwise you will need to download a copy form your hosting account. Or you could use SSH to edit it directly.
Regardless, you want to look for a variable called $wgDefaultSkin. It should be set to equal Vector. We want to change it to equal Timeless.
After saving the file, upload it back to your hosting account.
Now when you are logged out of the wiki, you should see the Timeless skin instead of Vector.
Modifying the Title Font Size for Timeless
You could go in and modify the Skin code directly (I did that when I was having issues with the correct method). The problem with this is that it goes away when the skin gets updated.
The correct way to be changing the appearance of a skin is as follows. Note I am using Timeless, but this should work for any skin.
In your browser, hover over the element you want to change. Then open it for inspection. This will be different on different browsers. In Firefox, right click and select “Inspect (Q)”. Copy down the code for your element someplace.
In the Media Wiki search bar (not your browser search bar) type the following.
Mediawiki:Timeless.css
This will open a page where you can enter CSS for your custom formatting. In my case I am modifying the following tag with a new font size. So I add the following custom CSS, derived form my inspection of the code..
#p-logo-text a {
  font-size: 1.5em;
}
Now I refresh my browser window. If no changes are visible, I may need to go into settings and clear the cache.
The end result is I have a slightly smaller title font that fits on one line.
The MediaWiki Tag
A quick note, the MediaWiki tag can be used for a lot of customization. We will explore it more in a later post. However another example would be MediaWiki:Sidebar to allow customization of the left hand column.
Conclusion
In this post we have changed both the Media Wiki default skin and user account skin. We have also done just a bit of CSS customization to the allied skin.
In the next post I will take a break form formatting and start setting up the hierarchy of my wiki.


Add New Comment