Retired Techie
Getting older, not necessarily wiser!
Multi ISP – Installing PFSense
Published on May 10, 2022 at 5:51 pm by LEWIntroduction
Continuing on form this post, it is time to install PFSense onto our computer router. And like most builds the first step is downloading the file from the PFSense site.
Incidentally if you want a pre- configured solution, Netgate (not to be confused with Netgear) offers several pre-built ones. Not sure about pricing, but the options are available on the PFSense web site.
Download PFSense
The downloads button is on the top right of the website. The PFSense version as of this date is 2.6.0. On the download page you can look at release notes and source code, as well as download an image.
I suggest not going with the daily image, unless you have a good reason to do so. Stay with the main stable download. You will need to select architecture (AMD-64 unless you have purchased Netgate equipment), your installer for AMD-64 (ISO or image file), and if you select the mem-stick then the console (I suggest VGA). Finally pick a download location close to you.
Once the download is done, you will need to extract the compressed file. Note the file is compressed with gzip. If you are using a version of Windows as your Operating System, you will not be able to decompress the file like you would a standard zip file. I suggest using the free 7ZIP program to extract the file form the archive.
Now create your install media. If you are using Windows, I suggest using Rufus or Etcher for this.
Installing PFSense
Installing PFSense is pretty straight forward. Just boot form your install media. Note, I suggest going into your BIOS/UEFI and making your hard drive first in your boot order to avoid a potential looping problem on reboot.
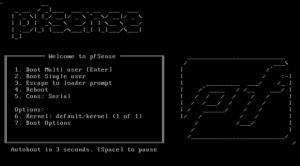
Upon booting from your boot media, you should come to this screen. Just wait a moment and the installer will start up. If you are booting for other reasons, press the space bar imminently to pause, so you can review the available options.
Next accept the copyright and distribution notice (only thing you can do at this point). Once you accept, you will be at the installation screen.
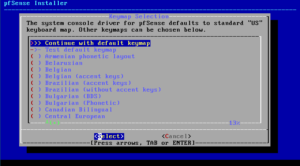
Select the install option. Then you will have a chance to select a default keyboard (note this is only for the install and does not carry over). Then you will need to decide on the file system you will use.
Unless you have a good reason, select one of the automated guided options (ZFS, BIOS, UEFI). By this point in time, most people should be familiar with BIOS and UEFI (If not, read this post). However this may be the first time some of you have heard of ZFS. If you have a fairly powerful multi core processor, and more than a couple of GB of RAM, I would suggest trying out ZFS. If you are not comfortable, you can chose one of the other options, depending on what your computer supports.
After all that, the install starts, now we just need to wait for it to complete.
Once the installation is complete, we will see the below screen you will be given the option to make any modifications. If you select No, then you will advance to the reboot screen.
Go ahead and reboot, then remove your installation media.
Conclusion
This has just been the install. The first time you log in you will need to go through a setup wizard. At a minimum you will need to setup one of your Network Interfaces, so you can use log into the browser interface. But that is the subject for the next post.


Add New Comment