Retired Techie
Getting older, not necessarily wiser!
Changing RJ45 Connector
Published on April 23, 2022 at 2:29 am by LEWIntroduction
Today, I am going to document changing an RJ45 jack on an Ethernet cable. Technically it is an 8P8C modular connector, and RJ45 (Registered Jack) is the standard. Regardless, changing one of these connectors is something most enthusiast will need to do at some point.
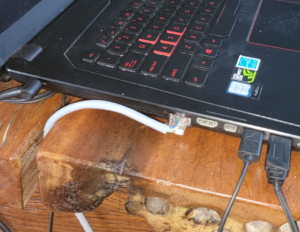
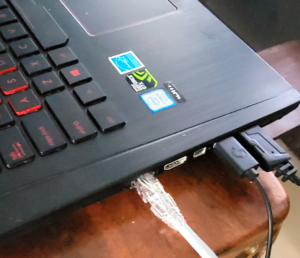
This will be for a gaming laptop, as the user wants a wired connection for better latency and less dropouts (lots of WiFi users in the household). At this point I am not sure of where the issue lies, but the existing cable has to be bent at approximately ninety degrees close to the plug on the laptop to make a connection.
Inspection
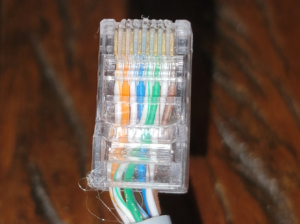
As with most troubleshooting, it helps to do a physical inspection of the issue before hazarding a guess as to the cause and attempting a fix. In this case we can see the Ethernet cable has the appearance of a home brew and not a commercial cable. There is nothing wrong with this in and of itself. However in this case we can see the separate wires exiting the back of the connector, where as the cable sheaving should extend into the connector for proper long term support. The fact that the cable needs to be bent back at almost ninety degrees indicated that the problem is most likely in the connector/cable rather than the Ethernet jack on the laptop.
Taking a closer look at the connector, we can also see that the color code is non standard. It does not conform to the T568 A or B standard. Since the cable does work I suspect the other end is wired the same, but I will need to take a look at it to make sure. The cable will work in low demand situations if wired the same way (incorrectly) at both ends. The problem with incorrect wiring is signals shared between multiple twisted pairs. This can lead to degraded performance due to interference (twisted pairs are designed to reduce electromagnetic interference). Standard color coding is given in the table below.
|
Pin |
T568A |
T568B |
|
1 |
Striped Green |
Striped Orange |
|
2 |
Green |
Orange |
|
3 |
Striped Orange |
Striped Green |
|
4 |
Blue |
Blue |
|
5 |
Striped Blue |
Striped Blue |
|
6 |
Orange |
Green |
|
7 |
Striped Brown |
Striped Brown |
|
8 |
Brown |
Brown |
Generally both ends of an Ethernet Cable should be wired the same. One exception is a cross over cable, where one end is wired as T568A, and the other end is wired as T568B.
Replacing the Connector
- Record the connector wiring scheme. If you are not replacing both ends, you will have to match this scheme to get the cable to work. Note, my observations tell me that T568B is the more common wiring scheme.
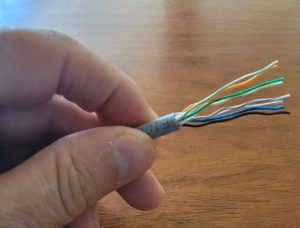
- Remove the original connector. If your connector has a boot, slip it over the cable before striping the outer sheaving back to expose 2.5 to 3 cm of the internal wires. Be careful doing this, you do not want to nick any of the internal wires. If using a stripper tool, do not do more than one rotation. The sheave should easily pull off.

- Depending on the type of cable there may be a center spacer and/or non wire filaments that you will need to cut away. Be careful not to nick any of the wires.
- Untwist the four twisted pairs and straighten out the wires. Put them in the correct order for your cable. Then trim the wires back to 1.2 to 1.3 CM, keeping all wires of equal length.
- Insert the cable into the connector carefully making sure each of the eight wires goes into its proper slot. When fully inserted, the sheaving should be within the end of the connector.
- Use the proper crimping tool, press down the metal tabs securing the connector to the cable. Note that in the absence of a crimping tool, you can carefully push the tabs down with a small flat blade screwdriver. Make sure to push down the back part of the connector that clamps onto the cable sheaving.

- Test the connector before final assembly. If it works, secure the boot (if it has one), and you are done.
Conclusion
This was a quick repair of a network cable used with a laptop. Not really a proper repair, as I had only one jack. On my next visit, I will bring multiple connectors, and rewire the cable to the T568B standard.
Your first couple of cable repairs might take some time. But you should master the skills needed fairly quickly. It is a very handy skill to have.


Add New Comment