Retired Techie
Getting older, not necessarily wiser!
JWM Part 5 The Tray
Published on October 1, 2021 at 10:43 am by LEWIntroduction
This is probably going to be the most complicated post of this series. We will be working with the JWM tray, and attaching/displaying the menu to a tray button. This only gets complicated as we have to jump back to the menu for a few minutes to cover how it is related. So we will be working in two sections of the JWM configuration file.
We will configure how our tray looks, where is is located, some of the tools in the tray, and how the menu will be displayed on the screen.
Mouse Bindings
With regard to the menu and tray button, the first thing we need to cover is the default mouse bindings. These can be changed, but I have not done any extensive testing with this. So we will use the defaults.
- Left Mouse Button is 1
- Middle Mouse Button is 2
- Right Mouse Button is 3

The scroll wheel bindings are something I need to run some more tests on. So I suggest not trying to change them in this initial basic configuration.
Root Menu Trigger
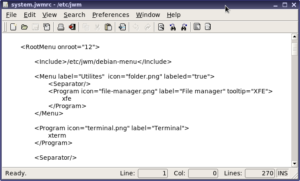
If we go back to configuring the root menu, we will see the following modifier in the tag.
<RootMenu onroot=”12”>
…
</RootMenu>
In the onroot modifier we specify the mouse buttons to press. In this case 1 for left mouse button and 2 for center mouse button. To test this move to a clear area of the JWM desktop and try both mouse buttons. Note it could be set to “123” in some distributions.
Technically we could have two different RootMenus, the first triggered by 1 (or left Mouse) and the second triggered by say 3 (or right mouse). That type of setup is a little beyond the scope of this series of posts (since I only need one menu at the moment).
Tray Button Root Menu Binding
We will jump into the whole tray in a moment. First I want to discuss binding of the TrayButton element to the RootMenu element.
The tray Button can be styled with an icon, label, and/or popup. I normally just use an icon. The JWM Icon is located in /usr/local/share/jwm directory (see previous discussion about icon paths). But any icon can be used.
There are three different things you can do with a tray button icon; execute a program, show the desktop, and trigger a root menu. Currently it should be set to root:1.
What I am going to do is make this work like a different really popular operating system and have the root menu only show up when we click on the tray button icon. To do this we make two changes.
First change the tray button action to root:0 (zero not the letter O). Second change the Root Menu element modifier to onroot=”0”. After saving the configuration file and reloading JWM, the root menu should now only show up when we click on the Tray Button (just like that other operating system).
Configuring and Styling the Tray
The tray is an element of the JWM Window Manager that holds many of the tools you will need to improve your desktop experience. We will cover some basic configuration, with the intent of making it similar in appearance to another popular operating system.
Note I am using the “other popular operating system” metaphor because it is familiar to most people. This is Linux, so remember you can do things any way you want too.
Styling and configuration of the tray are two separate elements. We will configure first, then style.
We use the <Tray></Tray> element to put a tray on the desktop. To position the tray we have several modifiers to play with.
- x: This is the X position on the screen. Positive numbers are offset from the right, and negative numbers form the left.
- y: This is the Y position on the desktop. Positive numbers are offset from the bottom, and negative numbers from the top.
- width: How wide the tray is. If not specified, zero is assumed, full screen width.
- height: How tall the tray is. A zero indicates the height is automatically calculated. A number specifies the height.
- layout: Horizontal or vertical layout, the default if not specified is horizontal.
- halign: This can be fixed, left, center, or right. Default is fixed.
- valign: This can be fixed, top, center, bottom. Default is fixed.
Once we define a tray, we can put a variety of different items inside of it. We have already discussed the TrayButton. Lets look at some of the other elements.
Spacer: inserts empty space between elements. You can specify the width and height.
Pager: This is a small representation of the virtual desktops. You can switch between desktops by clicking on them in the pager. If the modifier labeled is set to true, desktop names are displayed.
TaskList: This lists all your open windows. Right clicking on window names in the task list gives some management options. You can specify a maximum width.
Clock: This displays a clock in the tray. You can specify width, height, format, and zone. For format options refer to strftime. For zone options refer to tzset.
There are a few other tools available, but I am not covering them, because I do not use them and am not familiar enough with how they should be used.
Styling the Tray
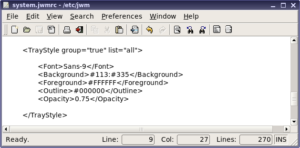
We are finally close to the end, this is turning into a really long post. Tray styling is done with the <TrayStyle></TrayStyle> tag. This one is easy, as it uses many of the same style tags as the Desktop background and the Windows.
There are two modifiers that can be used to make the tray a little more organized.
- group: This option groups like windows together. For example, two terminal application would be represented by one task entry, and right clicking on them would show the individual windows and various options for working with them.
- list: This controls which windows are shown in the tray. The options are all which shows all windows, and desktop which shows only windows open on the virtual desktop you are looking at.
Conclusion
After this overview of the tray, you should be able to set it up how you want and where you want. As I stated, this is one of the most complicated basic configurations of JWM. And it is really not that hard.
Next time we will look at some misalliances features of the JWM Window manager.
JWM Part 1 Taking Control
JWM Part 2 The Menu
JWM Part 3 Window Color
JWM Part 4 Desktop Background
JWM Part 5 The Tray
JWM Part 6 Exiting JWM
JWM Part 7 Bindings and Groups


Add New Comment