
Retired Techie
Getting older, not necessarily wiser!
An Inexpensive Vlogging Kit Review
Published on April 13, 2023 at 3:58 pm by LEWIntroduction
I decided to look into improving my video productions (not that I am doing a lot of them). To this end I picked up something called the “Like Me Vlogging Kit” by Digipower.
I already have a combination selfie stick/tripod I have been using for several years with my phone, of which I have no idea who made it. Most of these inexpensive items are not sold by the OEM (Original Equipment Manufacturer) Instead the OEM sell them to various retail outlets who we buy them from. So the best I can say is it was sold by Digipower, but I cannot say they did not manufacture it. A quick search showed me some really similar stuff being sold by different retailers.
So while the kit I have was put together by Digipower, I am not reviewing the retailer. Instead I am reviewing the items in the kit. And this is my opinion. While I have done video production, there are others with far more experience than I. But then again, those with more experience would probably opt for more expensive options.
The Kit
Depending on where you pick up this particular kit, it can cost between twenty to thirty US dollars.
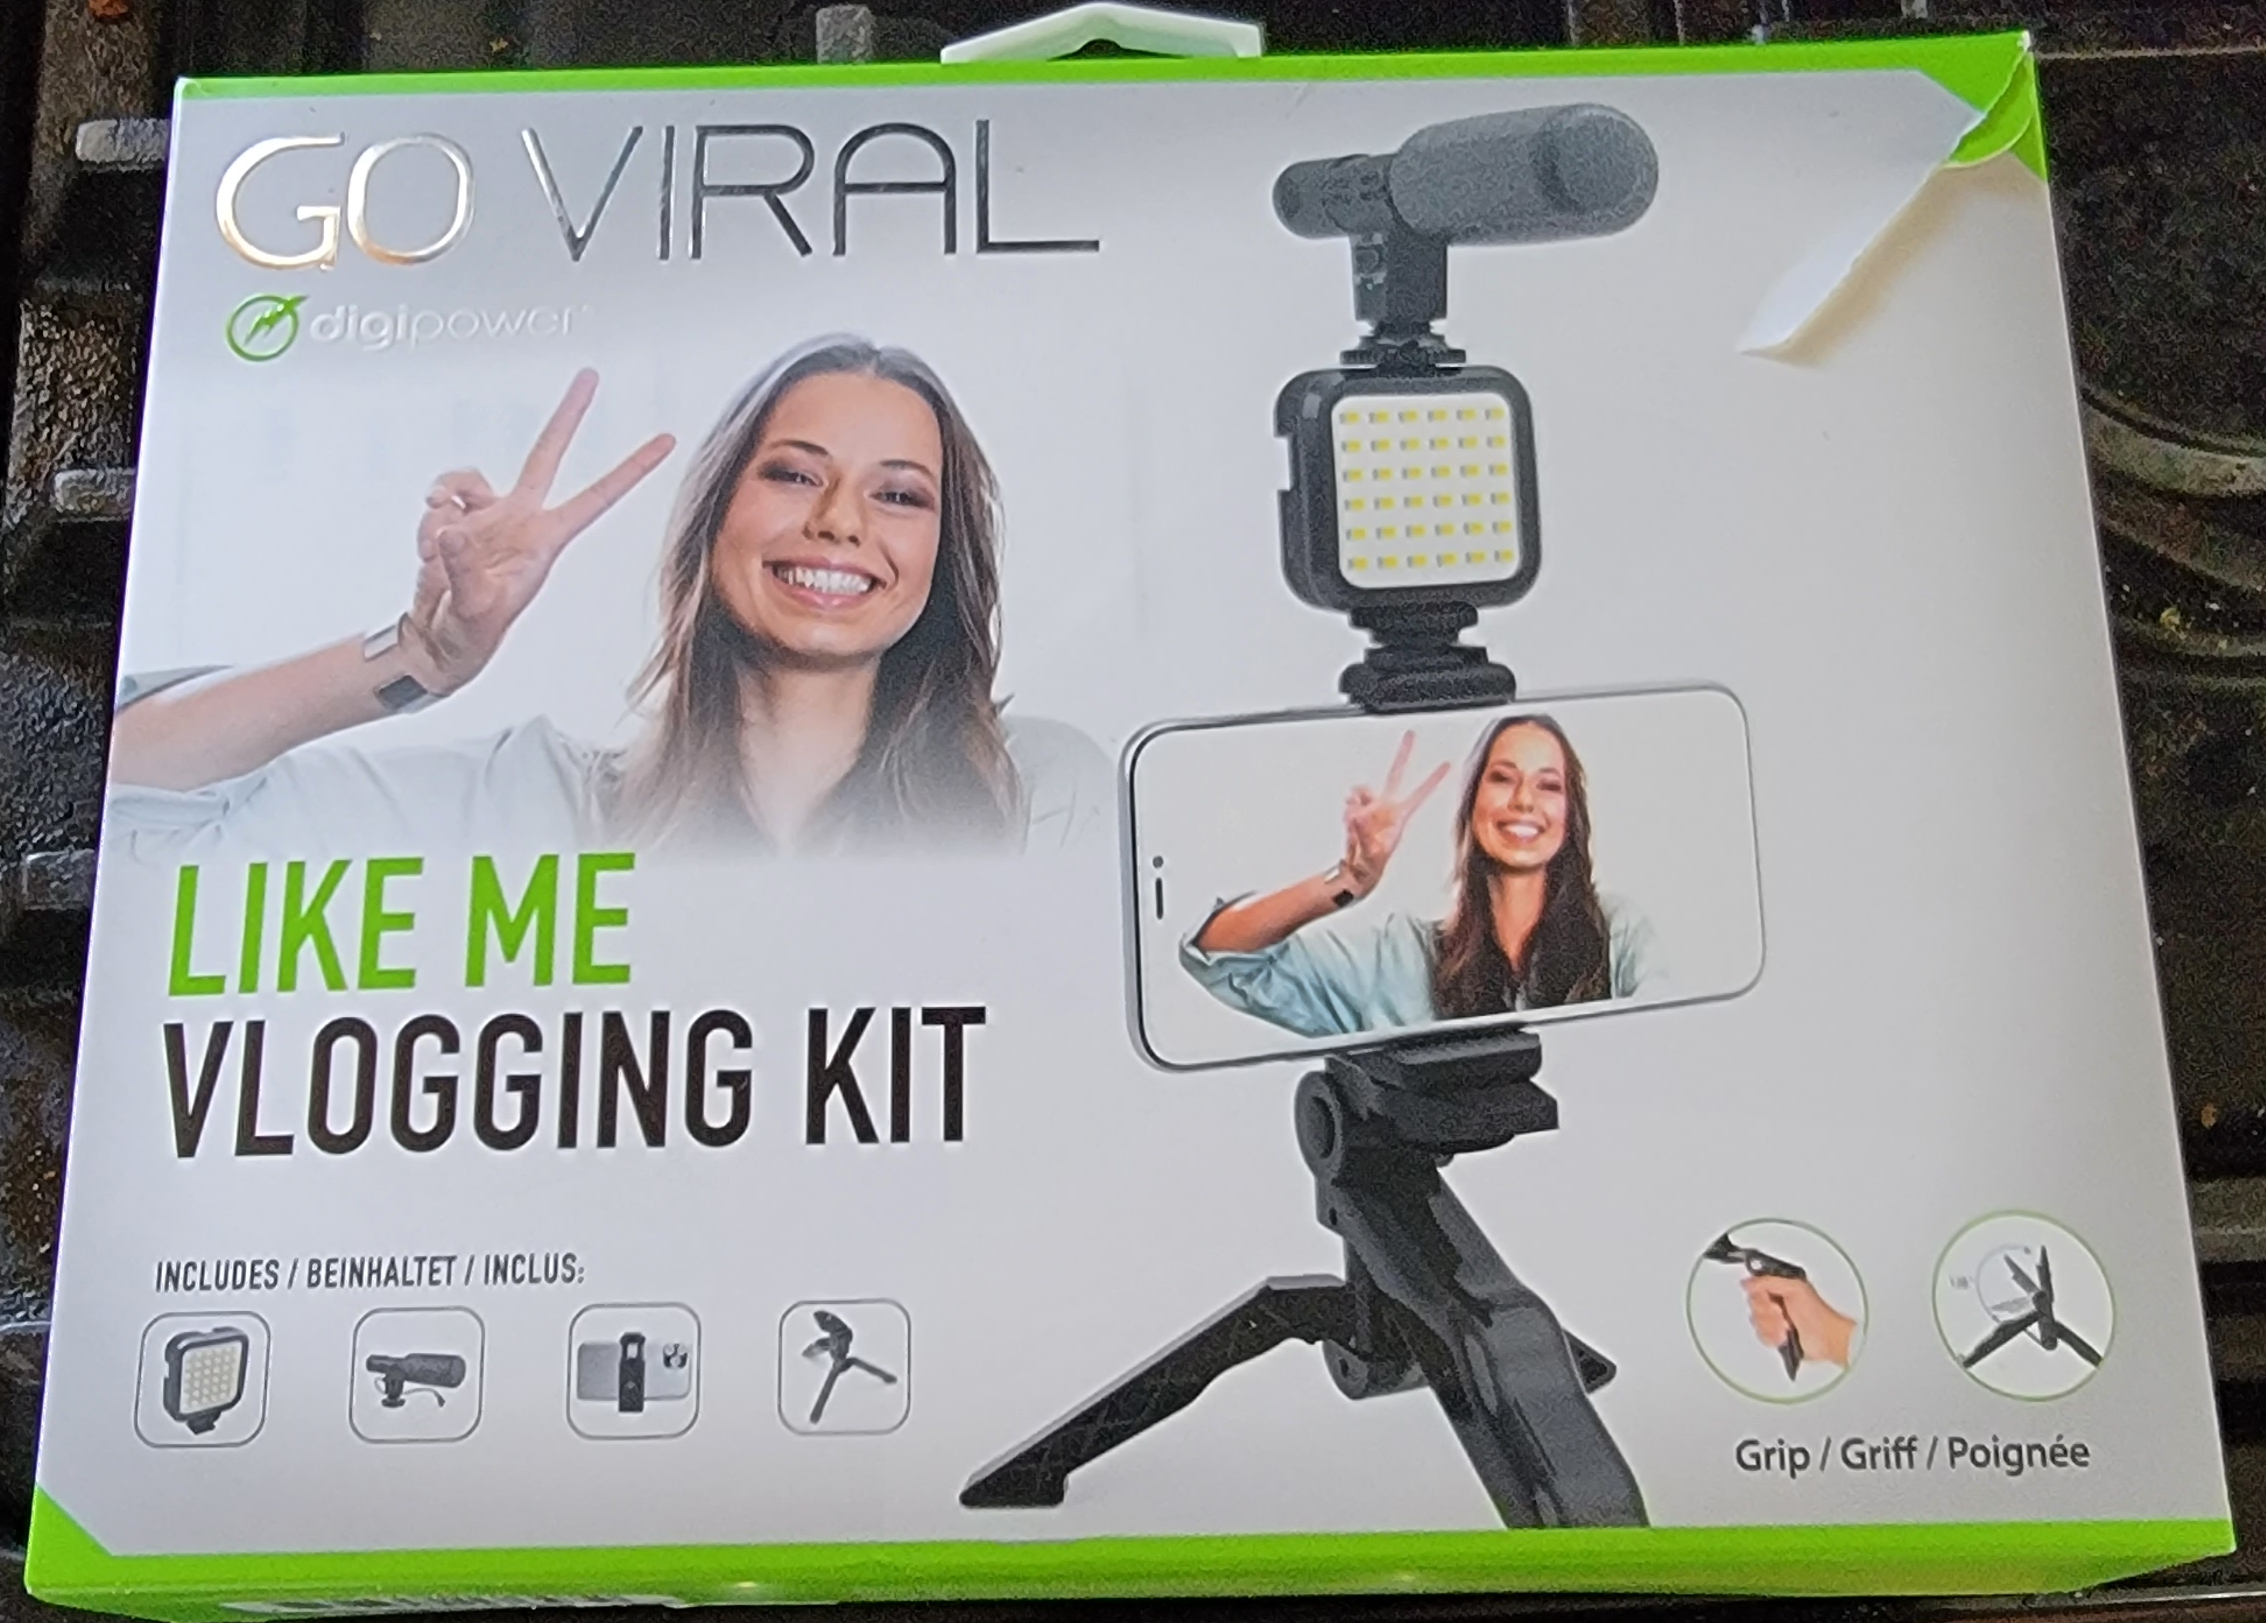
The kit can be used with a cellphone or digital camera (the box shows a cellphone). I have noted there are other versions of this kit by different retailers that may include additional equipment. More specifically, they may have a Bluetooth button. However I already have several of theses little gadgets lying around, so was not overly concerned that the kit did not have one. This may or may not be a concern for you.
This kit contains the following items; instruction sheet, a light with slide mount and slide mounting points, a microphone with a slide mount, a cellphone holder with a slide mount and a standard screw mount, a combination small tripod/pistol grip with a standard screw mounting point.
The screw mounts are the same as what is installed on most tripods (I checked against several different types I could get my hands on). The slide mount looks like the standard one I have seen on the top of SLR cameras, however not currently having one, I can not say for certain.
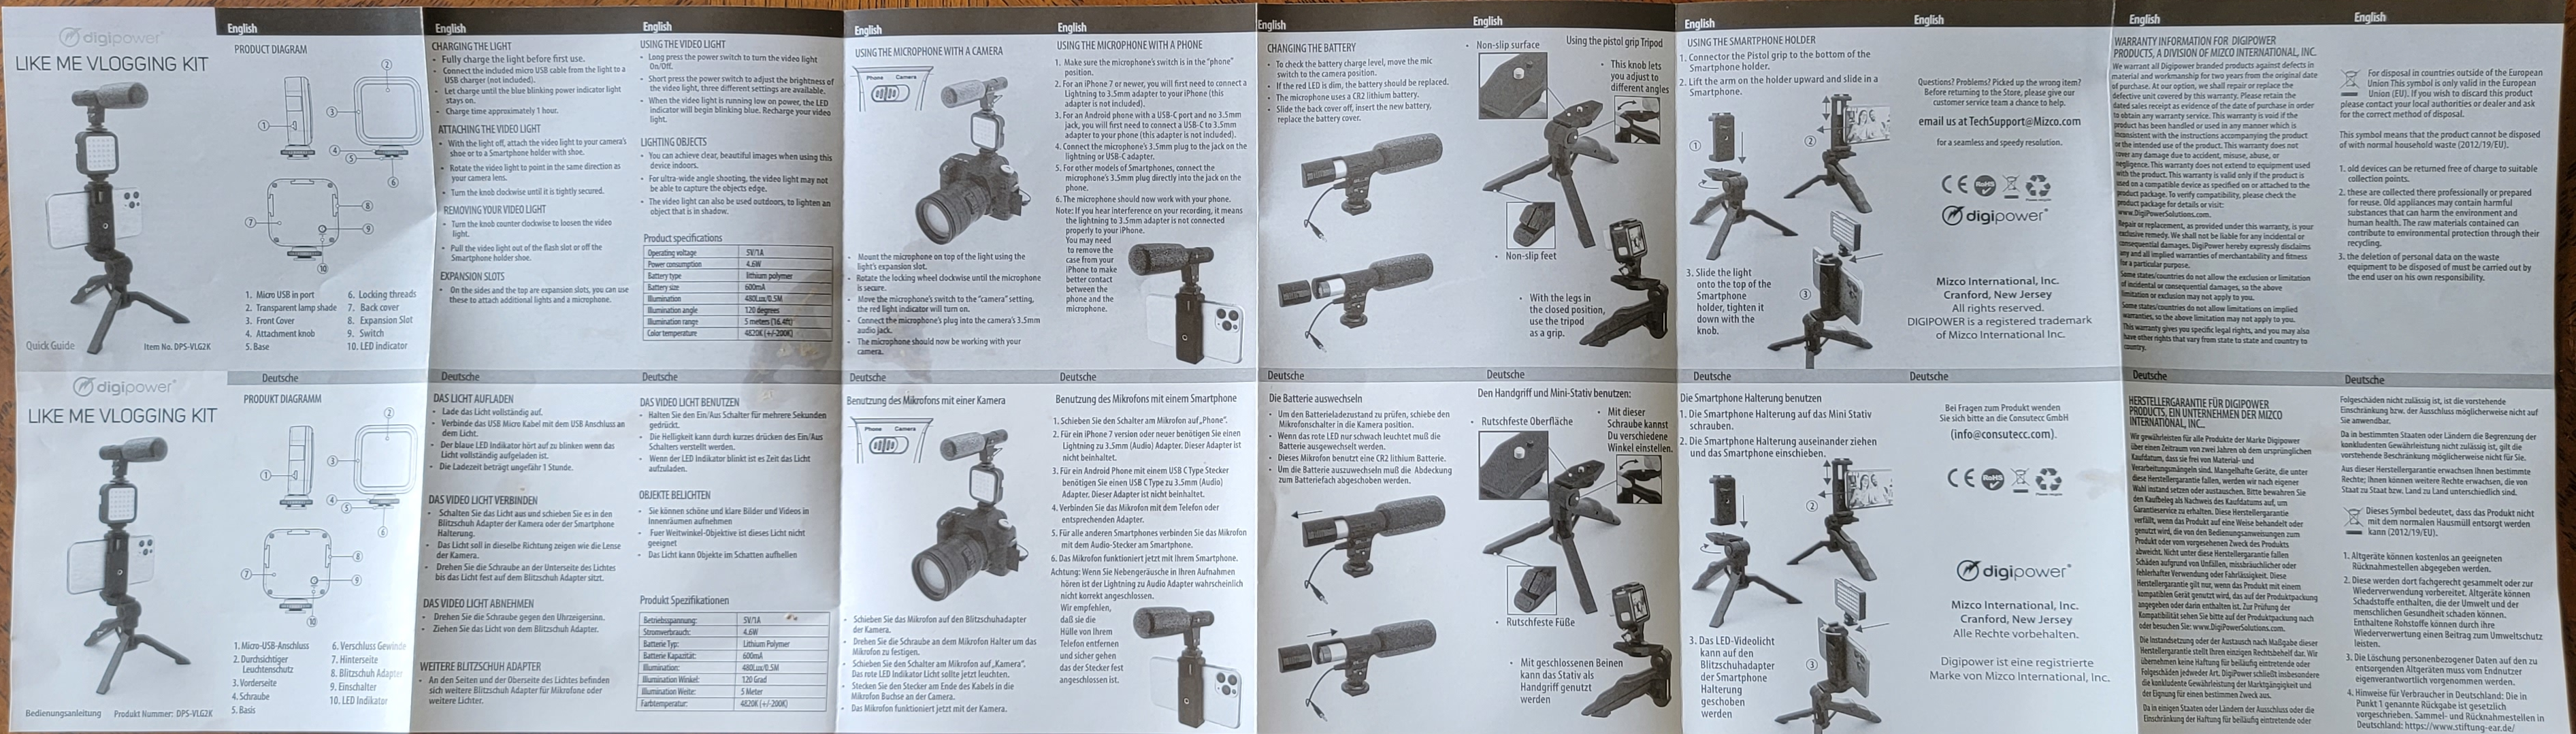
The instructions are the same sub standard affair that comes with most items these days. A single sheet written in three languages. Not that there is anything overly complicated about any of the parts, it would just be nice to see a proper manual every now and then.
The Pistol Grip Tripod
This item folds down into a fairly compact form and is very light, making it easy to slip into your bag. It is almost entirely plastic, meaning it is sturdy enough for light to some moderate duty. I suspect prolonged moderate to heavy duty usage would significantly shorten its lifespan.


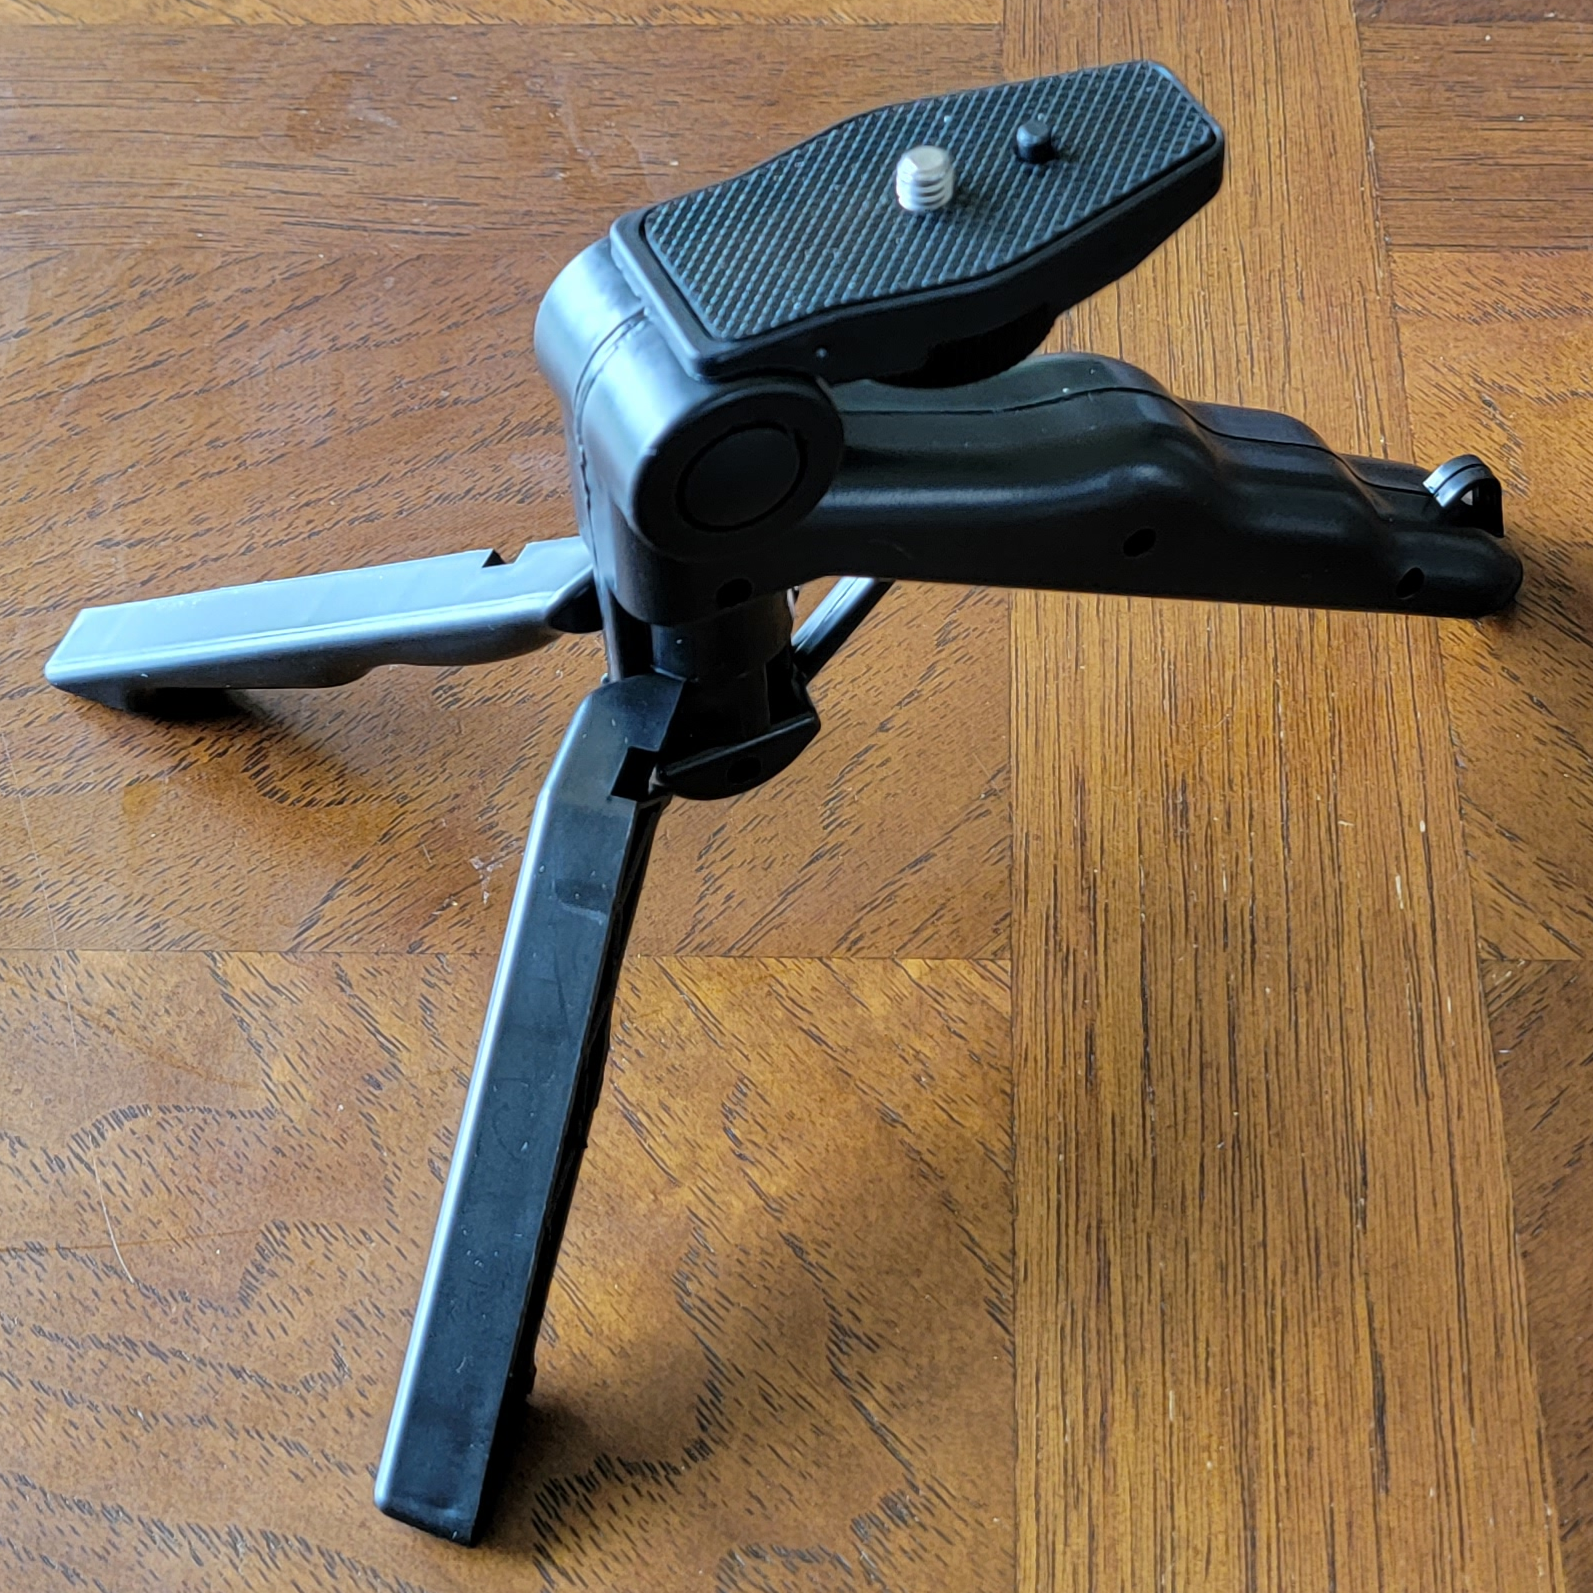
There is a button on either side of where the camera/phone mount joins the frame. Pressing both sides will allow you to rotate the mount in one axis to several different positions. It is held in place by an internal gear structure. There are two half width legs opposite the mount point that swivel out to form the base of the tripod.
Rotating the mount point all the way out is how to setup the pistol grip mode. Mounting your camera or cellphone allows you to hold it like a pistol while shooting pictures or videos.
Rotating the half legs out turns it into a small tripod. You can then adjust the mount to one of several preset angles. Note that there is no vertical height adjustment. Depending on how you are using it you may need to add blocks, books or something to adjust the height.
Cellphone Mount
This is a fairy standard type of mount, like you would find on a selfie stick. You can pull both ends to expand its vertical size to fit your camera. The spring retention is fairy sturdy out of the box.
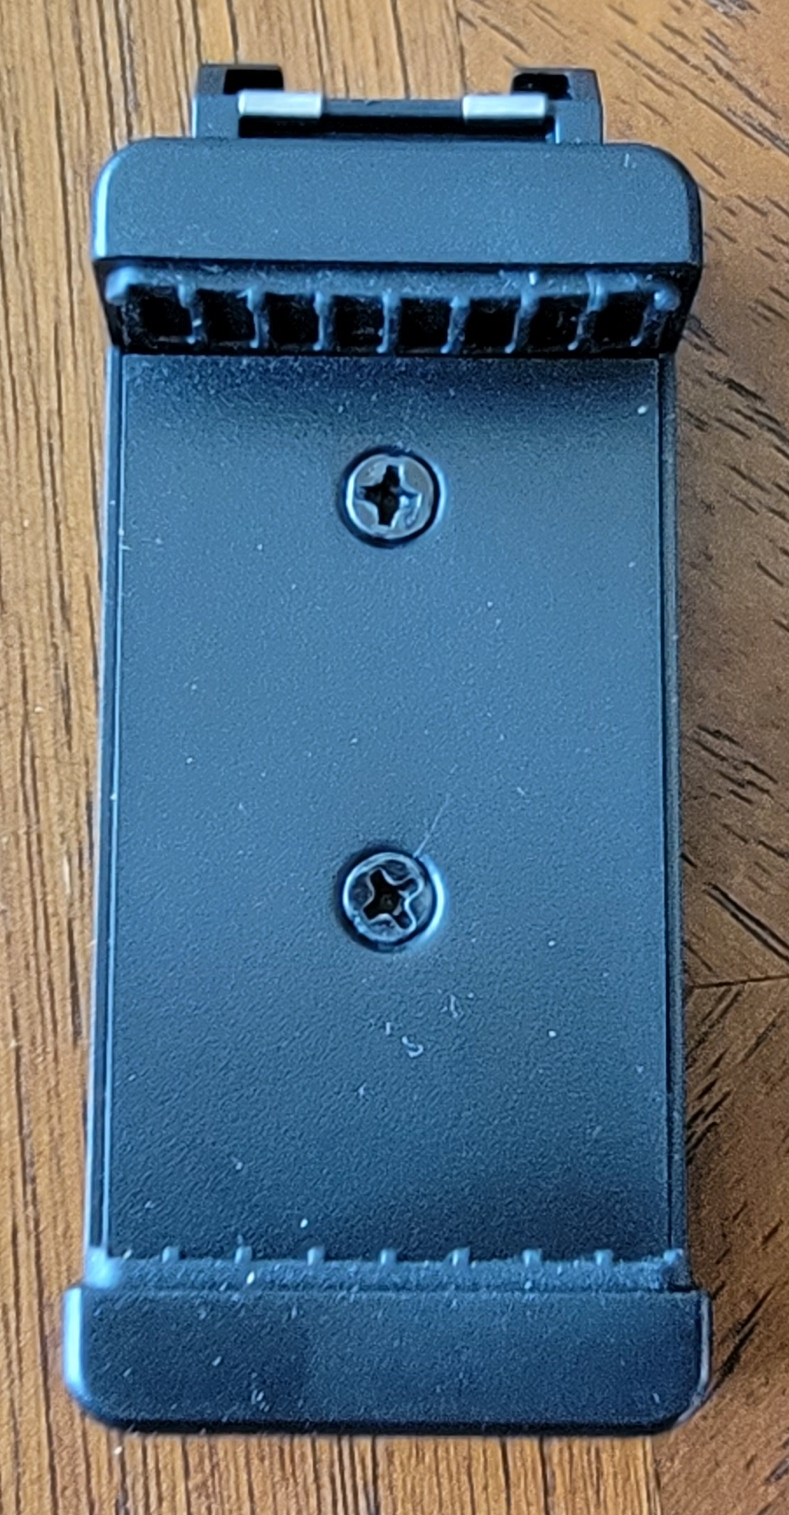
The threaded hole on the bottom is the screw hole where it mounts to the pistol grip tripod. I was able to use it with mounting points on several other tripods and frame devices, so I am assuming it is industry standard.
On top of the cellphone holder is a square mount point. It looks like a hot shoe attachment mounting point on SLR cameras. However I currently do not have one to compare it to, so can not say for sure.
Microphone
The microphone has a mini phono plug connector, and requires a battery, which comes with the kit. Note that the USB C to phono adapter does not come with the kit. I acquired it separately and it is required for most modern cellphones.

The battery case is at the back of the microphone, and can be opened by sliding it backwards and lifting up. To test the battery you slide the switch on the mounting point to the camera position and the LED should light if the battery is good. Note this implies that in phone mode the mic draws power form the cellphone. However I cannot confirm this. When I get a chance I will look at the power going through the USB dongle to see.
The mount point is the square type that mounts to the top of the cellphone adapter. It has a screw tightening device, so remember to loosen it when trying to mount it to other devices.
My one complaint, at this point, the battery is not standard (I would think they could use a triple A battery or a rechargeable one).
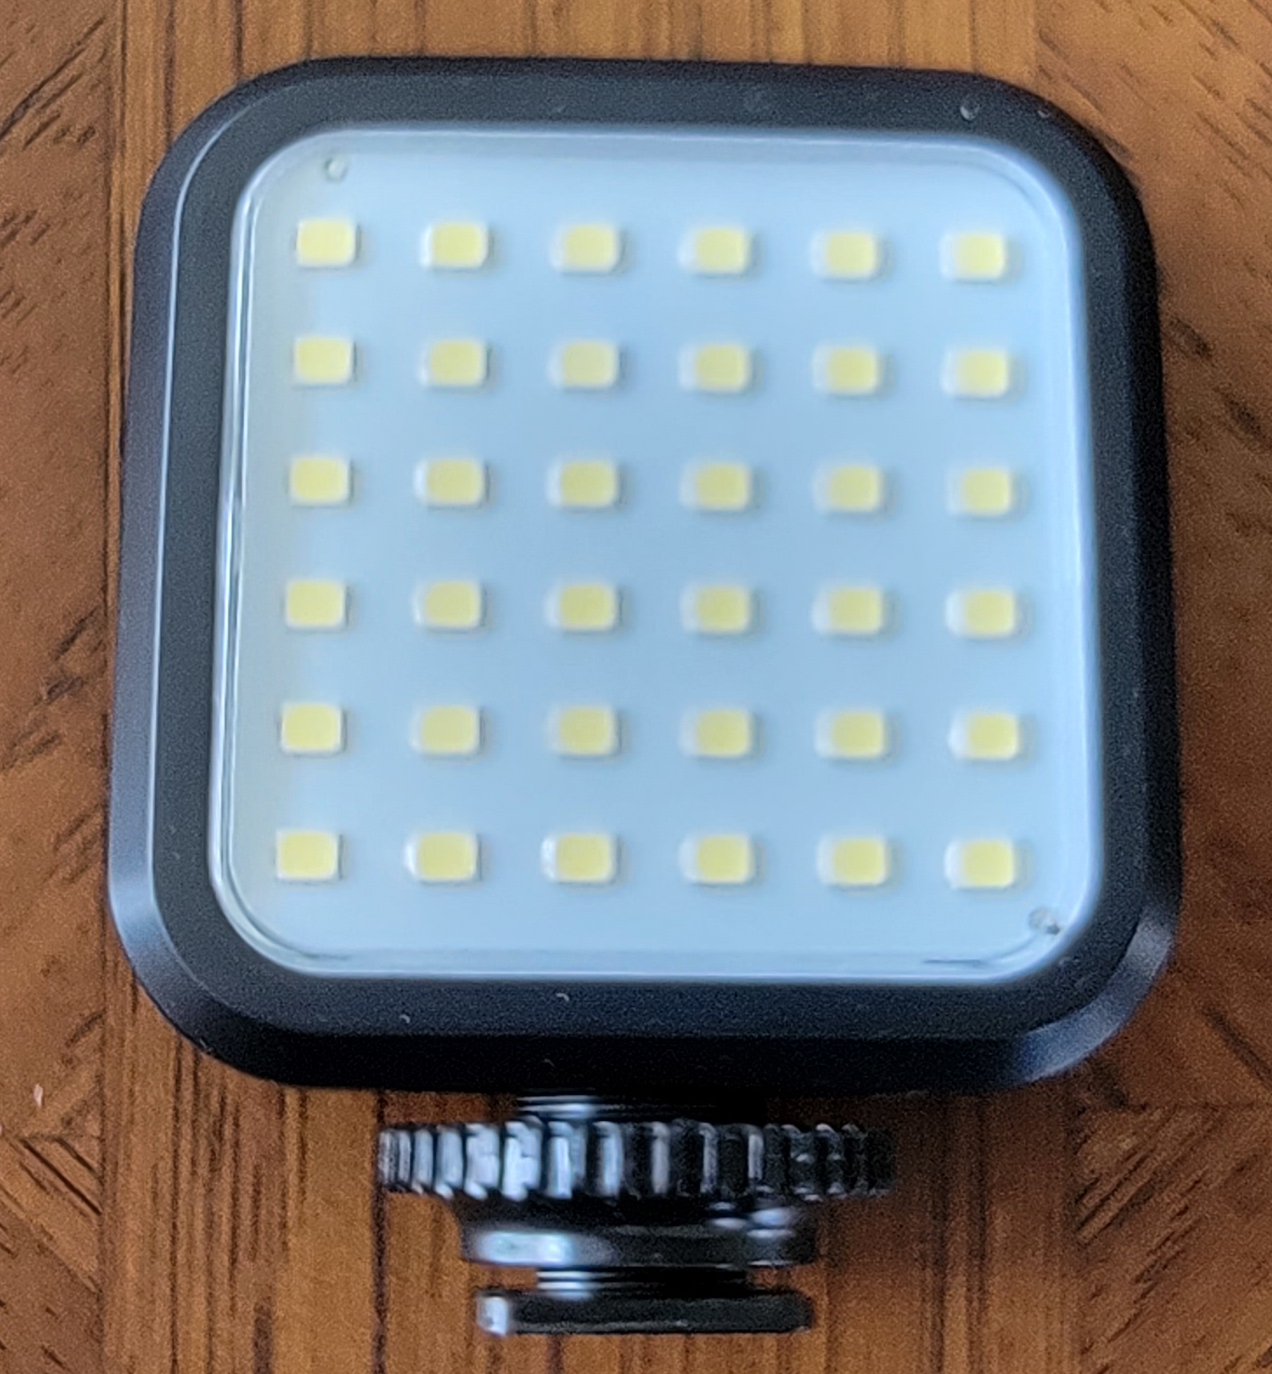
Light
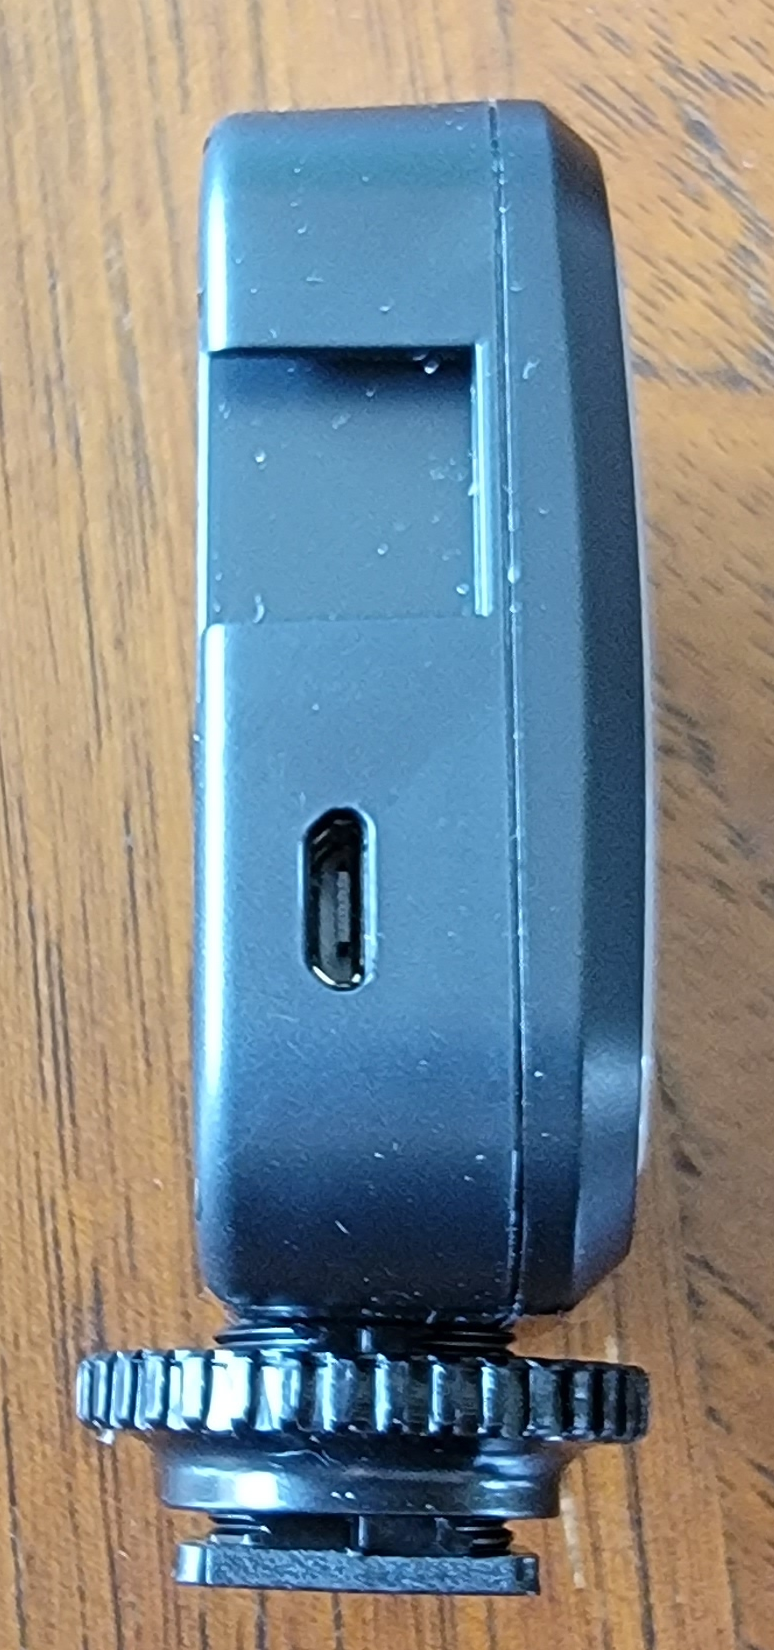
The light is an array of 36 LEDs. There is a micro USB charging port on the side (It would have been nice to use USB C, but the device does come with its own charging cable). There is a single control button on the back, along with a charging indicator LED.
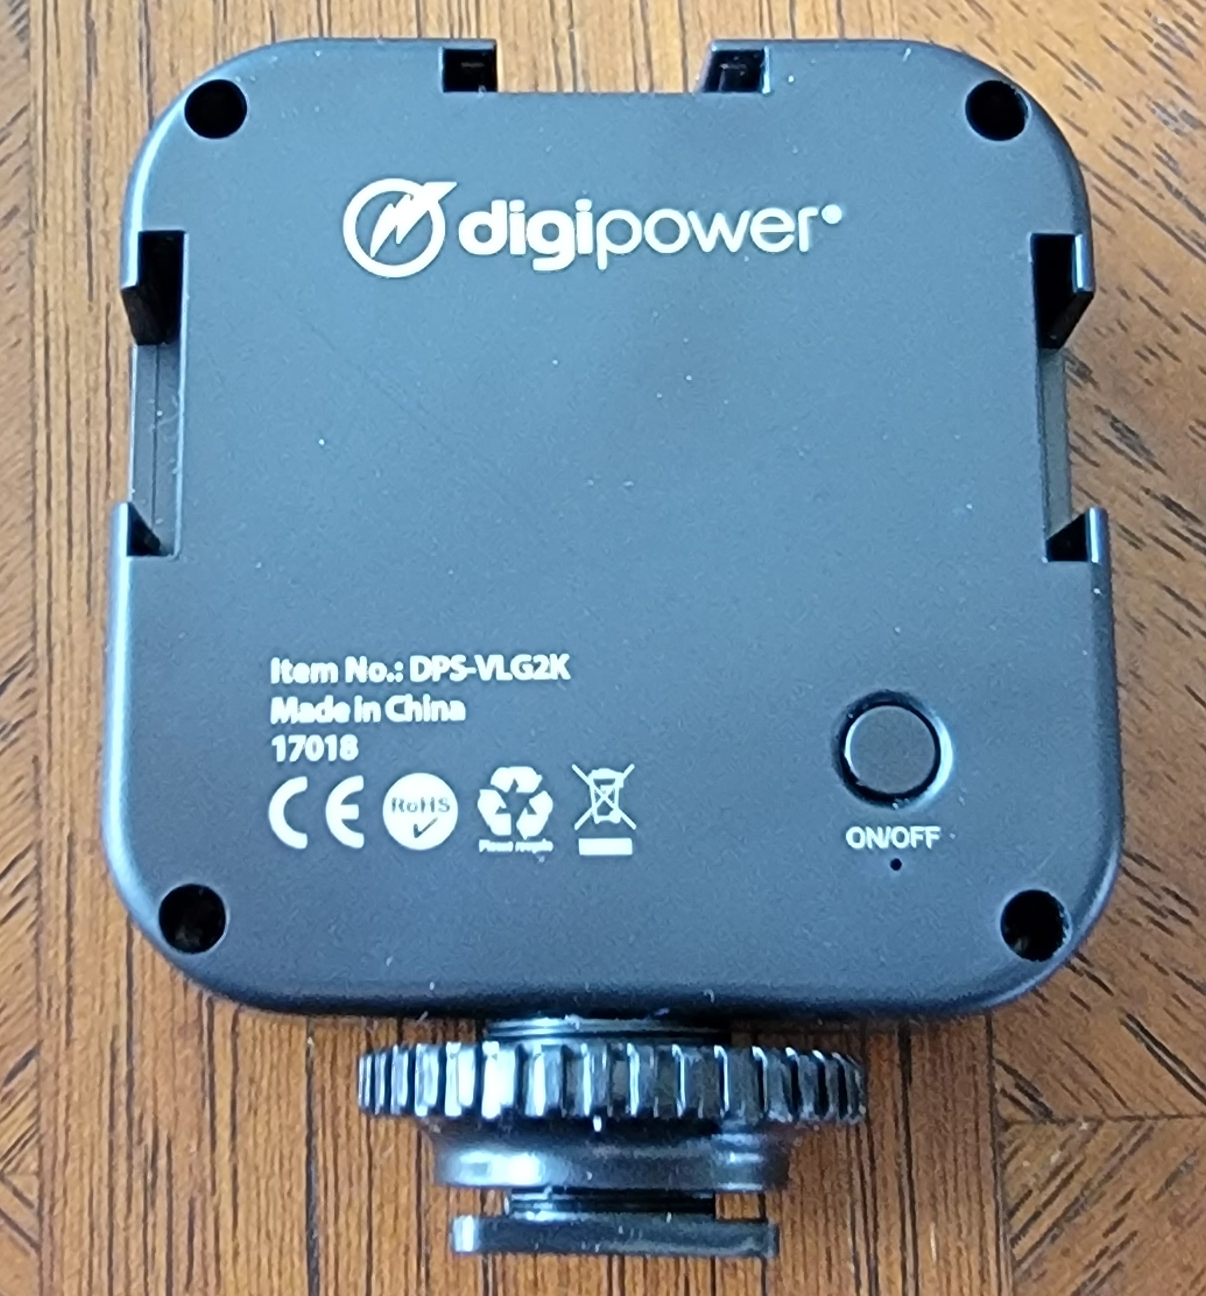
Long press the control button to turn the light on. Once on, short press it to change the intensity. There are three intensity settings.
There is a square mounting shoe with screw tighter at the bottom of the unit (don’t forget to loosen when mounting).
There are also three mount points on the sides and tops that will fit other devices, specifically the microphone in the kit.
Using the Kit
After unboxing I plugged the light into the charger for a couple of hours and inserted the battery into the microphone.
After that I set the grip up as a tripod on the table. Mounted the cellphone holder, and installed my cellphone. Then I mounted the light on top, and the microphone on top of that. This is the setup shown on the packaging, and it is somewhat tall. Side mounting the microphone to the light gives a lower profile.
I ran a series of test recordings going through the various combinations of light and external microphone. My results are somewhat subjective, as my experience with video production is somewhat limited. The results below are based on my personal observations, opinion, and limited experience.
Microphone Performance
Since I am using a cellphone, it is no surprise that I got better audio results with external microphone. I used it at ranges between 0.5 and 1.5 meters. Any closer and I started getting volume clipping. Any further and I had issues getting sufficient volume.
While not specifically stated, it is obvious that the mic is not designed to be used up close. My best results where around 0.8 to 1.0 meters. Closer and I needed to be aware of my speaking volume, and further and I need to talk louder than normal.
The mic exhibits some immunity from rear and side sounds. I would guess the major audio lobe extends forward and +/- 40 degrees side to side.
When compared against my Bluetooth headset, the mic still had better audio quality. It also did not suffer from cutouts, delays, and other Bluetooth connection issues.
When compared with my Behringer C-1 microphone, there was no contest. The Berhringer offered superior audio quality. But considering the cost differential (fifty to sixty dollars US for just the microphone) and the additional equipment/cables needed to use the Berhinger, for non audiophiles, and for being a cheap microphone, its performance is OK. A definite improvement over the internal cellphone microphone and the bluetooth headset.
Light Performance
The light is straight forward. It has three brightness settings. I have not yet used it extensively enough to make any determination on battery life.
At ranges of the microphone (0.5 to 1.5 meters) It works fairly well as a single point light. It is equivalent to any other single point light of equivalent specifications (480 LUX at 0.5 meters with a 120 degree spread). Obviously multi point lighting systems would be preferred but not always practical outside of the studio. I rate it as being a good performer for the price.
Overall Performance
The kit performance overall is OK. It does the job it was intended for, and the price is reasonable. I would recommend it for new users making videos with their phone, and who are not yet sure if they are going to continue doing video long term. It offers some improvement in both video and audio for a low price, and has some compatibility with other equipment like selfie sicks and tripods.
That being said, if I was designing the kit from scratch, there are a few things I would change.
- Would want the clear plastic light cover to offer some diffusion or have a clip on diffuser.
- Would want some vertical height adjustment from the grip when set up as a tripod.
- In this day and age should include the USB-C to Phono adapter in the kit.
- Adding a Bluetooth shutter dongle would also be nice.
Conclusion
Basically the kit does what it is deigned for, that is to offer some improvement to video and audio recording. It was obviously designed for cellphone usage. If one can afford a decent camera, one should also be able to afford better equipment.
This is not a knock against the product. The kit is obviously designed for the casual or new user. It is e=inexpensive and offers some improvement. Its price point is just about right for what you get.
Add New Comment