
Retired Techie
Getting older, not necessarily wiser!
Spreadsheet/Console Build Aid Fallout 4 Settlements
Published on September 29, 2022 at 6:24 pm by LEWIntroduction
In this post I will be using console commands to get around some of the limitations and issues inherent in the Fallout 4 settlement build system. Later I will provide a spreadsheet to help calculate positional information.
Many people consider using the Fallout 4 console a cheat, and they are entitled to their opinions. As for myself, it depends on what you are using the console for. If you are using it to overcome game design shortfalls and issues, such as the ones present in the settlement build system, then I question if that can be considered cheating, or just making effective use of available tools.
In the case of this post, I am using console commands to overcome some serious issues and limitations of the Settlement build system. Specifically how components are suppose to snap, and build issues due to collisions. None of these effect the actual game play (other than wasting hours trying to build a settlement just the way you want).
The Issues with the Build System
Anyone who has engaged in the Fallout 4 settlement build system has experienced many problems. For me the build system is one of the major aspects of the game, and also the most frustrating in many respects. If you are using mods, there are some that can improve the building system.
In this post I will be using console commands to aid in the placement of objects that don’t want to snap or otherwise go where you want them. Specifically I will be looking at full size floor tiles. Though this system can easily be adapted to any build object. And the calculations required are easy enough to do them with a calculator or a spreadsheet.
Console Commands for Objects
First to access the console on a PC, you press the “`” key (upper left corner of the keyboard). Since I do not have a gaming console, I am not sure if they have a console and how to access it.
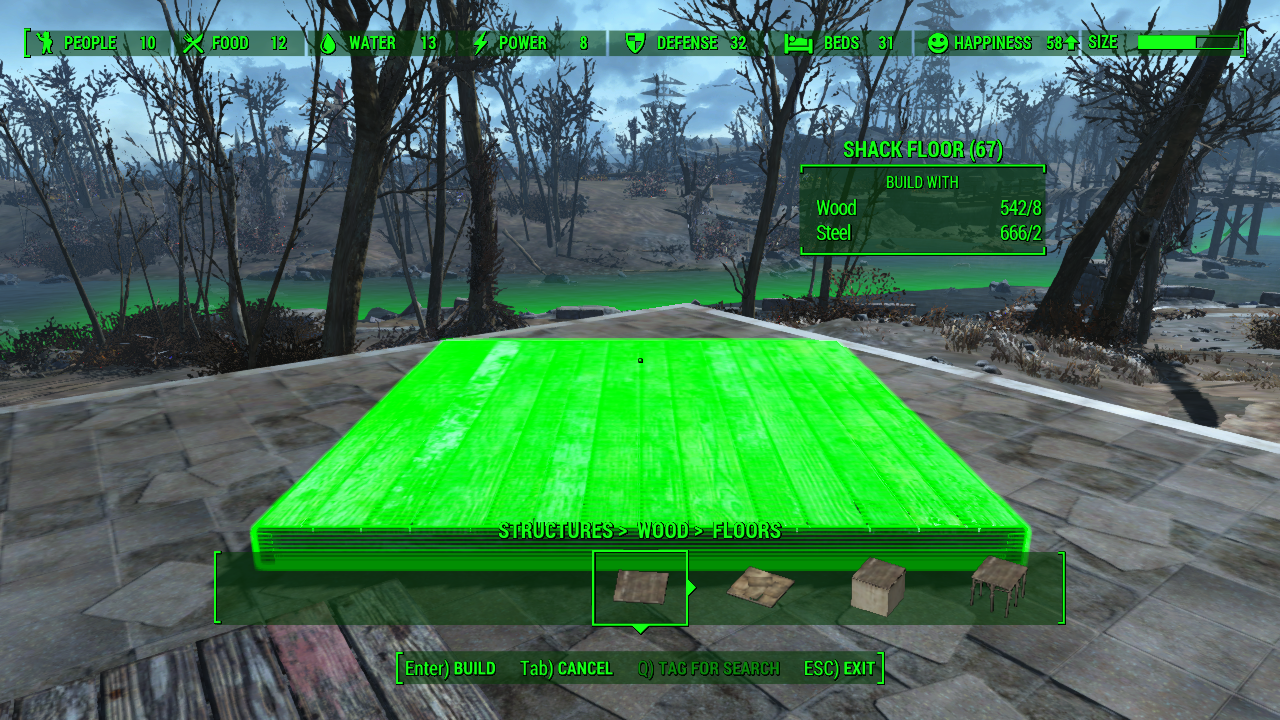
For this example I am assuming you went into build mode (long press v in an allied settlement on the PC), and dropped a SHACK FLOOR tile.
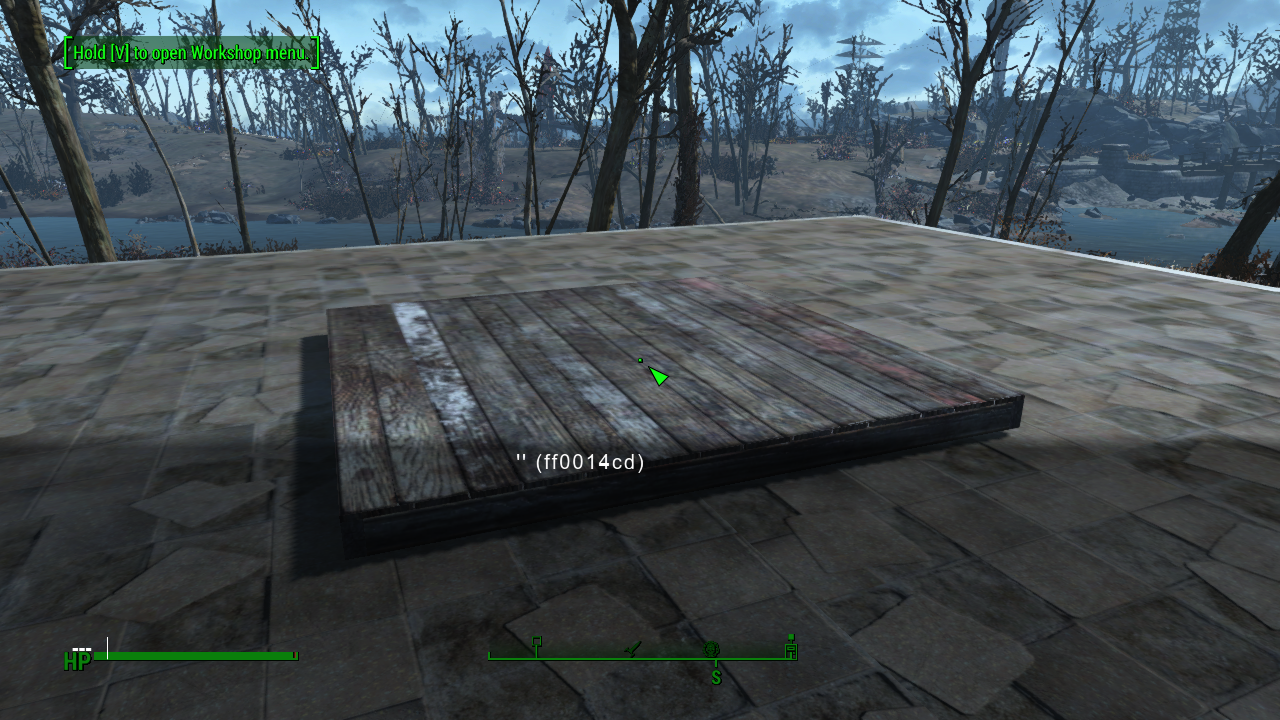
Enter the console and click on the floor piece. You should see an ID show up close to the center of the screen. You must have the correct piece ID displayed on screen for this to work. In this case the id is “ff0014cd”.
Once you have the piece selected type the following commands.
getpos x
getpos y
getpos z
getanlge z
These should provide the basic location information for your object within the world framework. Basically how far and in what direction you are from the center of the game map.
We only use “getangle z” because build objects are created with angles for x and y set to zero (in other words level). The “getpos z” indicates how high the piece is.
Some Boring Math
The Shack floor we have selected is 256 units deep and wide. Other floor objects could be 256 x 128 or 128 x 128. I am going to focus on aligning the 256 x 256 floor tiles. I will discuss the changes that need to be made for pieces that are less than full size. You can extrapolate this to vertical pieces, like walls, as well.
Basically if your z angle is 0, 90, 180, 270, or 360, moving the floor tile is easy. Go to the floor tile that it will not properly connect to, select it and get its x and y positions and z angle. Then go back to the tile you want to move and set its z angle with “setangle z”. Then using “setpos x” and “setpos y” move the tile by adding/subtracting 256 from the original floor tile x and y positions.
Note, for your information (fyi) in the Fallout 4 world framework west is +x, east is -x, north is +y, and south is -y. Also note 0 degrees is east, and 90 degrees is north, etc.
Assuming or original tile is at 1000 x 1000 (x and y) and 0 degrees, the below is an example of moving the tile to the west side of the original tile.
Setangle z 0
setpos x 10256
setpos y 10000
We are moving it in the +x or west direction. However the y position will remain the same in order to move the tile properly to the west side.
Note when we move tiles in this manner, no collisions/snaps occur.
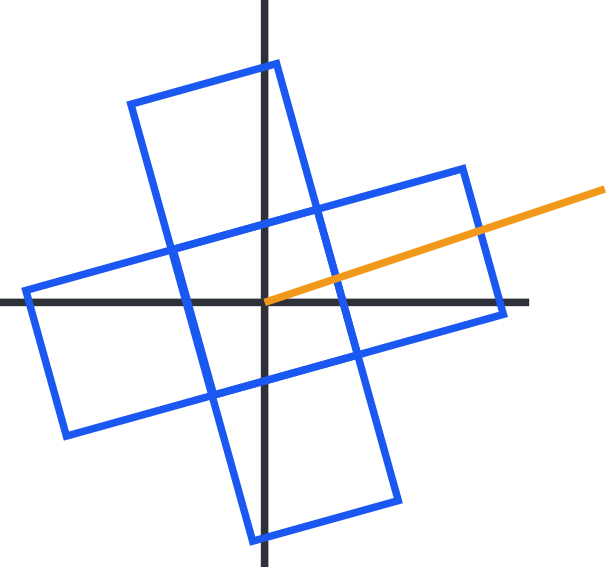
It gets a little more complicated when the angle is not 0, 90, 180, 270 , or 360. To determine x and y movement we need to apply some trigonometry, specifically sine and cosine functions. The 256 number, the distance between tile centers of our tiles, and is our hypotenuse. Therefore we can calculate x and y offsets with the following formulas.
Opposite side = sin(getangle z in degrees) times hypotenuse
Adjacent side = cos(getangle z in degrees) times hypotenuse
Assuming the same values as before, but a z angle of 20 degrees, we have the following equations of the x and y movement values.
X offset = 1000 + cos(20 degrees)*256
Y offset = 1000 + sin(20 degrees)*256
In this case the positions are x = 1240.56 and y = 1087.56.
If this is a little more than you are willing to go through, I have attached a Libre Calc file (an open source spreadsheet program) that calculates the x and y positions based on z angle for a grid of 3 x 3 tiles (sorry, but I don’t use Google Docs and have not used Microsoft Excel since I retired).
Half width Tile Calculations
For smaller (128 size) tiles, one would think you just use 128 in place of 256. However the placement locations are center to center. So you need to add in half the tile width to get them correctly placed. The correct distance center to center is 192 when using half size tiles with full size tiles.
Conclusion
We have gone over how to move tiles around in the Fallout 4 settlement build system using the console and a little math. Doing it this way avoids collisions and tiles not snapping where you want them. It is a little time consuming, and you should save often when doing this. However, if you are into settlement building, then getting perfect placements of objects in your settlement is worth the effort.
Add New Comment